

This is exactly where a ceramic patch antenna with a 100mm cable becomes the go-to solution for hardware engineers.
But why this specific configuration? And how do you sift through dozens of datasheets to find the best one for your build? Let’s strip away the marketing jargon and look at the engineering realities.
Why a Ceramic Patch? (The GNSS Requirement)
Unlike Wi-Fi or Bluetooth signals, signals from GNSS (Global Navigation Satellite System) satellites are incredibly weak by the time they reach Earth. Furthermore, these signals are Right-Hand Circularly Polarized (RHCP).
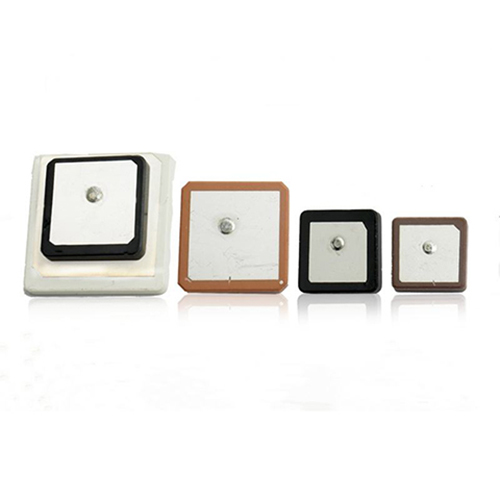
A ceramic patch antenna is physically designed to match this polarization. The square ceramic dielectric substrate (often seen in sizes like 15x15mm, 18x18mm, or the industry-standard 25x25mm) captures these overhead signals far better than a standard linear antenna. If you want a fast "Time to First Fix" (TTFF), a ceramic patch is your best bet.
Why Specifically a 100mm Cable?
The 100mm (about 4 inches) micro-coaxial cable is the "Goldilocks" length for most IoT and industrial enclosures.
-
Optimal Placement: GPS antennas need to face the sky. A 100mm cable allows you to mount the patch antenna to the inside roof of your plastic enclosure using double-sided 3M adhesive, while routing the cable down to the main PCB module.
-
Minimal Signal Loss: Every millimeter of coaxial cable introduces insertion loss. A 100mm cable provides enough flexibility for mechanical assembly without degrading the RF signal excessively—a common problem with 200mm or 300mm cables.
-
Cable Management: It’s long enough to reach the connector, but short enough that you don't have to awkwardly coil excess wire inside a cramped housing, which can create unwanted inductance and interference.
Active vs. Passive: Which is Best?
When sourcing this assembly, you will immediately face a choice: do you buy an active or a passive patch antenna?
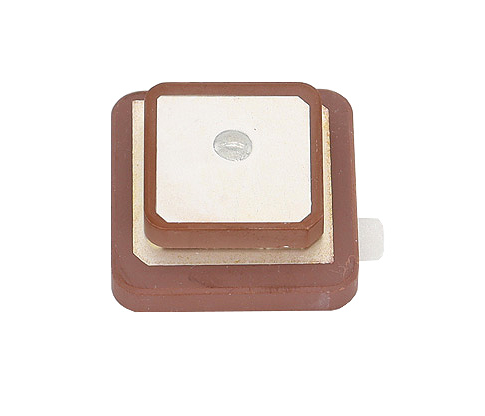
1. The Passive Patch Antenna This is just the ceramic block, the metal tuning pin, and the cable. It relies entirely on your mainboard's RF front-end to amplify the signal.
-
Pros: Cheaper, consumes zero extra power.
-
Cons: The 100mm cable will introduce slight signal attenuation (usually around 0.1 to 0.2 dB) before the signal even reaches your board.
2. The Active Patch Antenna (Recommended for most cabled setups) An active patch includes a tiny built-in PCB with a Low Noise Amplifier (LNA) and a SAW filter, hidden beneath the metal shielding.
-
Pros: It amplifies the satellite signal before it travels down the 100mm cable, completely negating the cable's insertion loss. This ensures your GPS module gets a clean, strong signal.
-
Cons: It requires power (typically 3.3V or 5V) supplied through the coaxial cable (DC bias) from your mainboard.
Engineering Tip: If you are using a 100mm cable, an active ceramic patch antenna is almost always the better choice for reliable outdoor tracking, typically offering an LNA gain of 28dB to 30dB.
Key Specs to Verify Before Purchasing
Don't just look at the price tag. The best ceramic patch antenna with a 100mm cable should meet the following criteria:
-
Connector Type: Ensure it matches your board. The most common for internal routing is the IPEX MHF1 (compatible with U.FL). If your board has an SMA port, make sure you order the SMA-male version.
-
Center Frequency: It must be tuned to
1575.42 MHzfor standard GPS. If you need multi-constellation support (GLONASS, Galileo, BeiDou), look for a wider bandwidth patch (e.g., 1561~1602 MHz). -
VSWR: Look for a Voltage Standing Wave Ratio of
< 2.0. -
Adhesive Backing: A high-quality industrial adhesive (like 3M VHB) is crucial. If the adhesive fails in a vibrating vehicle, the antenna drops, loses its sky-facing orientation, and your device loses its GPS lock.
Installation Warning: The Ground Plane Effect
Even the best cabled patch antenna can fail if installed poorly. A ceramic patch antenna is highly dependent on a ground plane to function properly.
While active antennas are slightly more forgiving, you should never mount the antenna directly against large metal batteries, motors, or LCD screens. Mount it against the plastic radome (enclosure), keeping a clear space directly below it.